Chimney Flashing Repair
Chimney Flashing Repair in Wilmington DE
The chimney is the most leak-prone detail on any roof — a big masonry box punched through the shingles, with four sides of flashing standing between your attic and the rain. We rebuild chimney flashing across Wilmington, DE: step flashing, counter flashing, mortar joints and cricket details, done the way that actually keeps water out.
Service overview
Why does chimney flashing fail?
Chimney flashing fails because two different materials — masonry and roofing — move, age and weather at different rates. Mortar joints erode, step flashing corrodes or lifts, counter flashing pulls out of its mortar groove, and the sealant bridging the two eventually cracks. In Wilmington's freeze-thaw winters and nor'easter rains, that process runs faster than most homeowners expect.
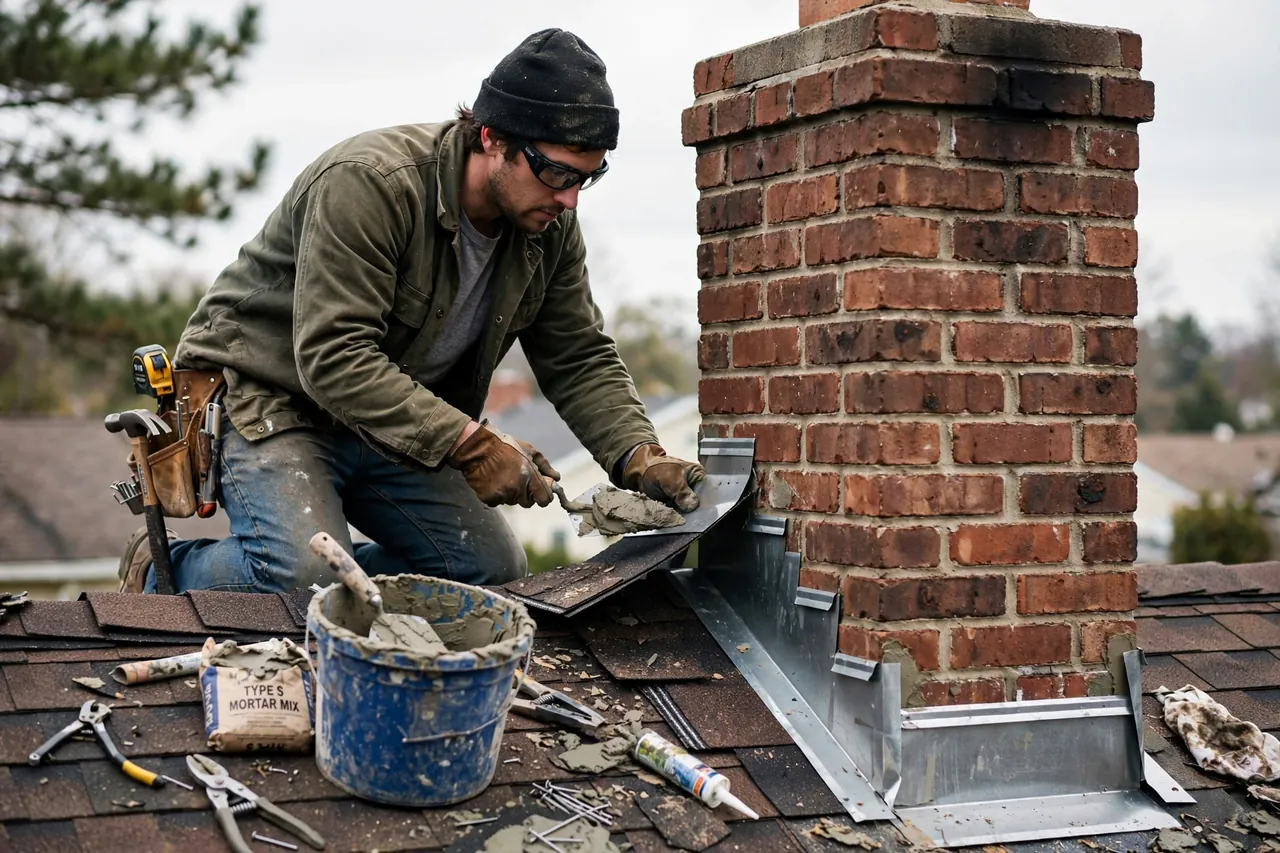
Proper chimney flashing is a two-part system, and understanding both parts explains every failure. Step flashing consists of individual L-shaped metal pieces woven into each shingle course along the chimney sides, directing water down and off the roof. Counter flashing — also called cap flashing — is embedded into the chimney's mortar joints and folded down over the step flashing, so water running down the masonry drips onto the step flashing instead of behind it. When both parts are sound and overlapped correctly, the system is nearly bulletproof.
Failure starts at the interfaces. Mortar joints on Wilmington's older brick chimneys — many laid a century ago — soften and erode, loosening the counter flashing's grip. Thermal movement works step flashing nails loose. Well-meaning past repairs smear roofing tar across the whole assembly, which cracks within a couple of seasons and traps moisture against the brick, accelerating the decay it was meant to stop.
The cricket matters too. On chimneys wider than about 30 inches, building practice calls for a cricket — a small peaked diverter on the uphill side that splits water around the chimney instead of letting it pond against the masonry. Many Wilmington chimneys lack one, and the uphill flashing takes a beating every storm. Where the chimney is wide enough to need it, we recommend adding a cricket as part of the flashing rebuild.
What makes chimney leaks especially destructive is their path. Water entering at the flashing runs down the outside of the chimney chase — inside your walls — or along rafters far from the chimney before dripping. By the time a stain appears on a ceiling, the leak has often been active for months, rotting framing and saturating insulation along the way. That is why flashing gets our full attention during any roof assessment.
Practical benefits
Why rebuild chimney flashing properly
Chimney flashing is the highest-leverage repair on most roofs. Here is why doing it right matters.
Stops the most common roof leak at its source
Industry experience consistently points to flashing — and chimney flashing first among it — as the leading source of roof leaks. A proper rebuild eliminates the single most likely water entry on your roof.
Protects the chimney structure itself
Water getting behind failed flashing does not just enter the house — it saturates the masonry, and freeze-thaw cycles then crack bricks and mortar from the inside. Good flashing protects the chimney, not just the roof.
Ends the tar-and-caulk cycle
Layered tar and caulk around a chimney base is the signature of a flashing problem treated as a sealant problem. A metal-to-metal flashing system with proper overlaps does not need goop, and does not fail when the goop cracks.
Preserves historic brickwork
On Wilmington's century-old chimneys, correct counter flashing installation — reglet-cut into mortar joints, never face-mounted with visible fasteners — respects the masonry and avoids the damage that shortcut methods cause.
How service works
Our chimney flashing repair process
A flashing rebuild is precise work. Here is the sequence, start to finish.
STEP 01
Full chimney assessment
We examine the flashing, mortar joints, brick condition, crown and cap, plus the attic around the chimney chase for staining. The repair plan covers the flashing and anything the failed flashing has damaged.
Tools and methods
Tools and methods for chimney flashing
Reglet cutting tools
Cut clean grooves into mortar joints for the counter flashing to seat into — the correct method, versus surface-mounting with exposed fasteners.
Sheet metal brake
Bends step flashing, counter flashing, head and apron pieces to the exact dimensions of your chimney on site.
Masonry grinding and repointing tools
Prepares deteriorated joints to receive counter flashing and restores the mortar the flashing depends on.
Ice-and-water shield
Wraps the chimney base and decking before flashing goes on — the backup layer if wind-driven rain ever gets past the metal.
Copper, aluminum or galvanized steel
Flashing metal matched to the roof and the chimney's character — including copper for historic Wilmington homes where it belongs.
Hose water testing
Verifies the rebuilt assembly sheds water correctly before we call the job done.
Where this service fits
When your chimney flashing needs attention
Stains on the ceiling near the fireplace.
Water entering at chimney flashing often shows up as staining on the ceiling around or below the chimney — sometimes rooms away, since water travels along framing before dripping.
Visible tar or caulk smeared around the chimney base.
Thick black buildup around the chimney is a history of failed patch attempts, not a repair. Underneath it, the flashing has usually been failing for years.
Mortar crumbling where flashing meets brick.
If you can see gaps between the counter flashing and the masonry, or mortar falling out in chunks, the flashing has lost its anchor and water has an open path behind it.
Local execution
Chimneys across Wilmington
Wilmington's chimneys span a century of masonry — each era with its own flashing story.
Trolley Square
Tall, ornate Victorian chimneys with corbelled brickwork and multiple flues. Flashing here must follow complex profiles; we custom-bend every piece and set counter flashing into repointed joints without disturbing the decorative brick.
Historic District
Some of the city's oldest masonry, where original lime mortar is soft and fragile. Counter flashing installation is done with particular care — reglet cuts in the mortar, never through the brick faces.
Forty Acres
Mid-century brick chimneys, often wide enough to need a cricket that was never installed. We assess the uphill water load and add cricket diverters where the chimney width calls for them.
The Highlands
Chimneys shaded by mature trees stay damp longer, accelerating mortar decay. Flashing rebuilds here routinely include repointing the lower courses where moisture has done the most damage.
Baynard Village
A mix of ages and past repairs — many chimneys carry the layered tar of decades of patches. Stripping back to sound masonry and rebuilding correctly is the standard job.
Problems we solve
Chimney flashing problems we repair
The recurring failures we find at Wilmington chimneys — and the correct fix for each.
Counter flashing pulled from mortar joints
When mortar erodes, the counter flashing loses its grip, opens a gap, and water runs down the masonry straight behind the step flashing. We repoint the joints, cut fresh reglets, and set new counter flashing properly embedded — mechanically locked, not just glued.
Rusted or missing step flashing
Original galvanized step flashing eventually corrodes through, and on some older or repaired roofs it was never installed at every course. We install complete new step flashing woven into each shingle course, integrated with the underlayment — the water-shedding layer the system depends on.
No cricket on wide chimneys
Chimneys wider than about 30 inches without an uphill diverter collect a wedge of water and debris against the masonry every storm. We build a proper cricket — framed, decked, underlaid and flashed like a tiny roof — so water splits around the chimney instead of attacking the flashing.
A practical standard for every visit.
Clear planningPrepared arrivalsCareful workLocal follow-through
Experience in the details
How we approach chimney flashing
Chimney flashing is where roofing meets masonry, and it demands respect for both trades. Our approach treats the chimney as a system: masonry, flashing metal and roof surface working together.
- Two-part system always: step flashing plus counter flashing, properly overlapped.
- Counter flashing set into mortar joints — never surface-mounted with exposed fasteners.
- Incompatible patch materials stripped out, not layered over.
- Mortar repointed where the flashing needs sound joints to grip.
- Crickets added on wide chimneys where the water load demands one.
Common in this area
Common chimney flashing scenarios
What brings Wilmington homeowners to us about their chimneys — and how each case is typically handled.
Water stain on the living room ceiling below the chimney
Symptom: A spreading stain on the ceiling near the fireplace, worse after wind-driven rain, with no visible roof damage from the ground. Typical fix: Chimney flashing rebuild: strip old flashing and tar, repair any damaged decking, install new step flashing woven into the shingles, set counter flashing into repointed mortar joints, water-test the assembly.
Thick tar buildup around the chimney base
Symptom: Layers of black roofing tar smeared around all four sides of the chimney, cracking and peeling, with dampness in the attic nearby. Typical fix: Complete removal of incompatible patch materials back to clean masonry, assessment of what the tar was hiding, then a proper two-part flashing system installed — no tar in the finished assembly.
Crumbled mortar and loose flashing on a century-old chimney
Symptom: Mortar falling out in pieces where the flashing meets the brick, flashing sections visibly shifted or hanging. Typical fix: Repointing of deteriorated joints, new step and counter flashing throughout, with reglet-set counter flashing that grips sound mortar — preserving the historic brickwork while making the detail watertight.
Where we work
One local team. A lot of ground covered.
Downtown WilmingtonHistoric DistrictTrolley SquareHighlandsBaynard VillageRiverfrontForty AcresBrandywine Village
Check my address Location and pattern tell the story. Stains on ceilings near or below the chimney, dampness in the attic around the chimney chase, or leaks that worsen in wind-driven rain all point to flashing. We confirm with a close inspection of the flashing assembly and water testing — because repairing the wrong thing helps no one.
Step flashing is a series of L-shaped metal pieces woven into each shingle course along the chimney's sides — it is the primary water-shedding layer. Counter flashing is embedded into the chimney's mortar joints and folded down over the step flashing, so water running down the brickwork lands on the step flashing instead of behind it. Both parts must be sound for the system to work.
That is exactly what fails. Sealant-only repairs crack within a couple of seasons under thermal movement and UV, and tar traps moisture against the brick, accelerating masonry decay. The lasting repair is a proper metal flashing system with correct overlaps — sealant plays only a supporting role at terminations.
Properly installed metal flashing lasts decades — often as long as the roof itself. What shortens its life is poor installation, incompatible metals causing galvanic corrosion, mortar deterioration loosening the counter flashing, and tar patches trapping moisture. When we rebuild it, we address all of those factors.
We select flashing metal appropriate to the building — including copper where it suits Wilmington's historic homes — and set counter flashing into mortar joints so the installation respects the masonry. The goal is a detail that works for decades and looks like it belongs.
If the chimney is wider than about 30 inches measured across the uphill face, building practice calls for one. Without it, water and debris wedge against the uphill flashing every storm. During assessment we measure and evaluate the uphill water load, and recommend a cricket where it is warranted.
Most chimney flashing rebuilds are completed in one to two days, depending on chimney size, mortar condition and whether decking repairs or a cricket are involved. Water testing is always part of the job before we finish.
Keep exploring
Related Services
Your next step is waiting
Chimney flashing you can stop worrying about.
Call The Roof Medics. We will assess your chimney's flashing and masonry, show you what is failing and why, and rebuild the detail properly — so the next storm is just weather, not a worry.
Start with the basics
Contact Us for Roof Repair
Reach out to us for any roof repair needs. We are available Monday to Friday and respond quickly to inquiries.